
How to use Port Forwarder
Install
- Mac: open
PortForwarder-mac.dmgfrom the download page, drag Port Forwarder to Applications and open it. The app is signed and notarized by Apple. - Windows: download
PortForwarder-win-setup.exeand run it. If SmartScreen appears, click More info and then Run anyway. - Make sure
kubectlworks in a terminal (kubectl get pods). No kubectl yet? On a Mac runbrew install kubectl, on Windows runwinget install -e --id Kubernetes.kubectl.
Use
- Open Port Forwarder. It uses the current context of your kubeconfig and the
defaultnamespace. Type your namespace in the header: the list fills with the workloads found there. - Click the play button on a row to forward it. The big number is the local port, the small one is the port inside the pod. To use a different local port, click the pencil on the row.
- Click a row to see its log and the address to connect to (for example
postgresql://localhost:5432). Click the address to copy it. - Open the preset settings (the sliders icon), tick the services you use together and save. From then on the Run button in the header starts the whole preset.
- Two clusters? Click the context name in the header, open Contexts and choose which kubeconfig context is staging and which is production. Switch with the two tabs at the top left.
- Leave the app open while you work. If a pod restarts, the forward reconnects on its own. Stop all ends every forward, and so does quitting the app.
Shortcuts: Ctrl+F (Cmd+F on a Mac) or / jumps to search, Esc steps back. The EN / ID button in the header switches between English and Indonesian.
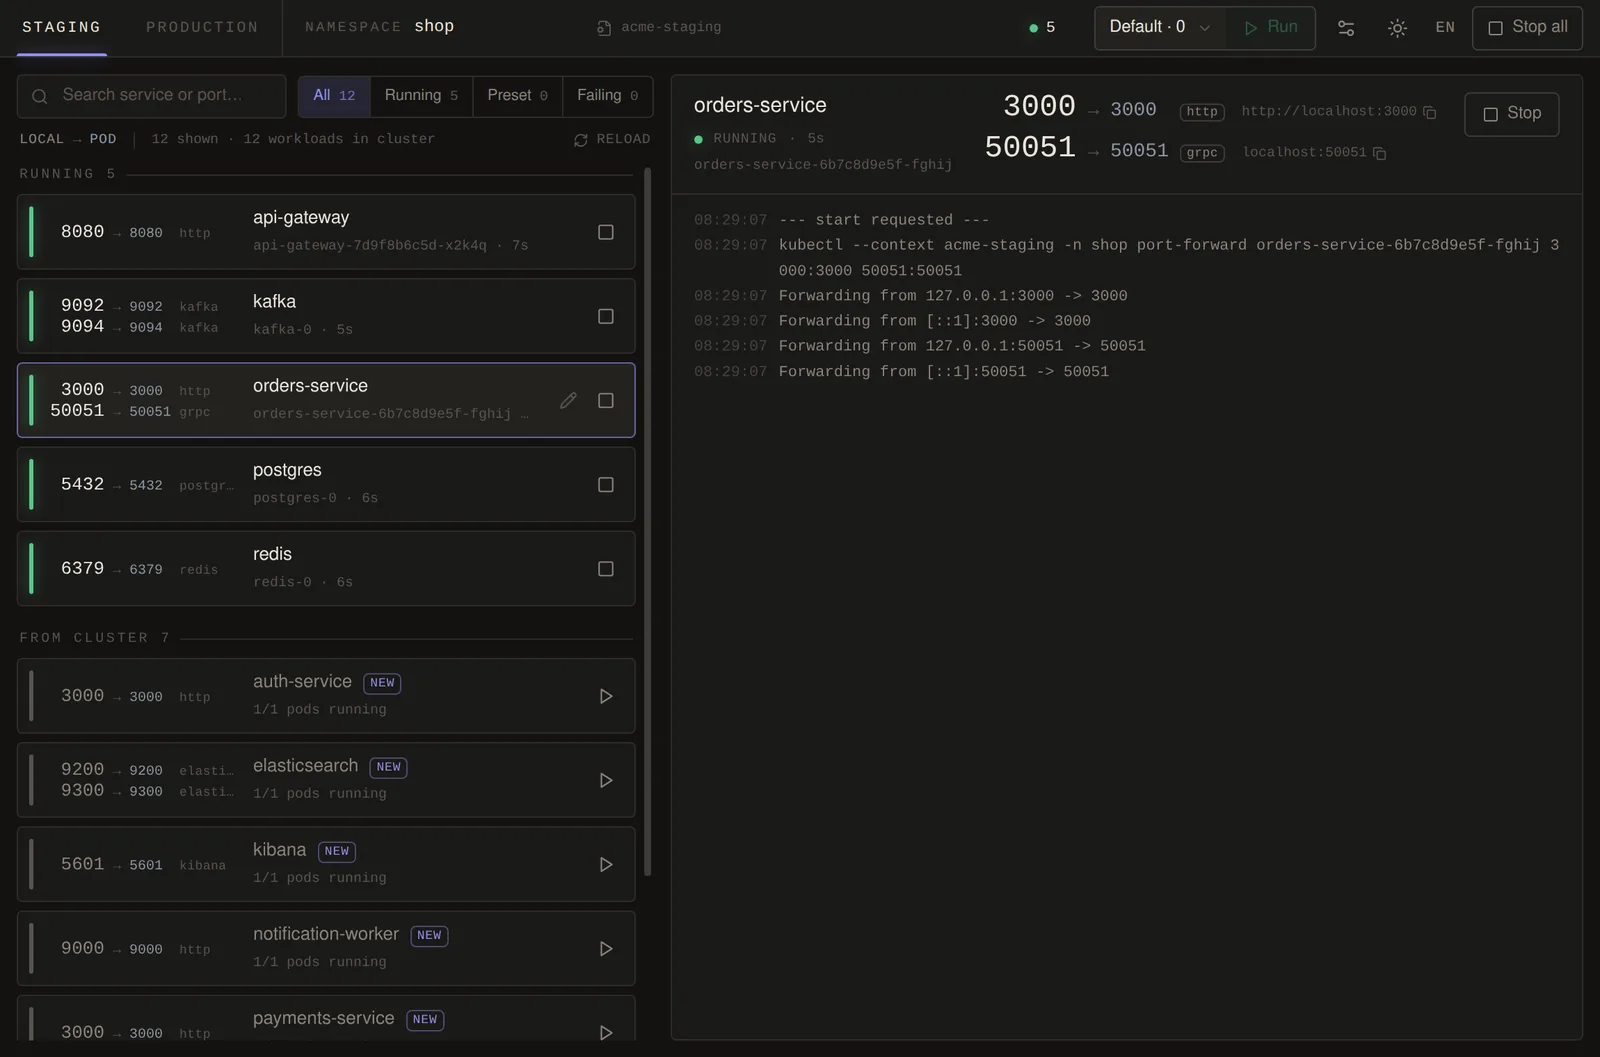
Five forwards running. The local port is the big number; the panel on the right shows the selected service and its kubectl log.
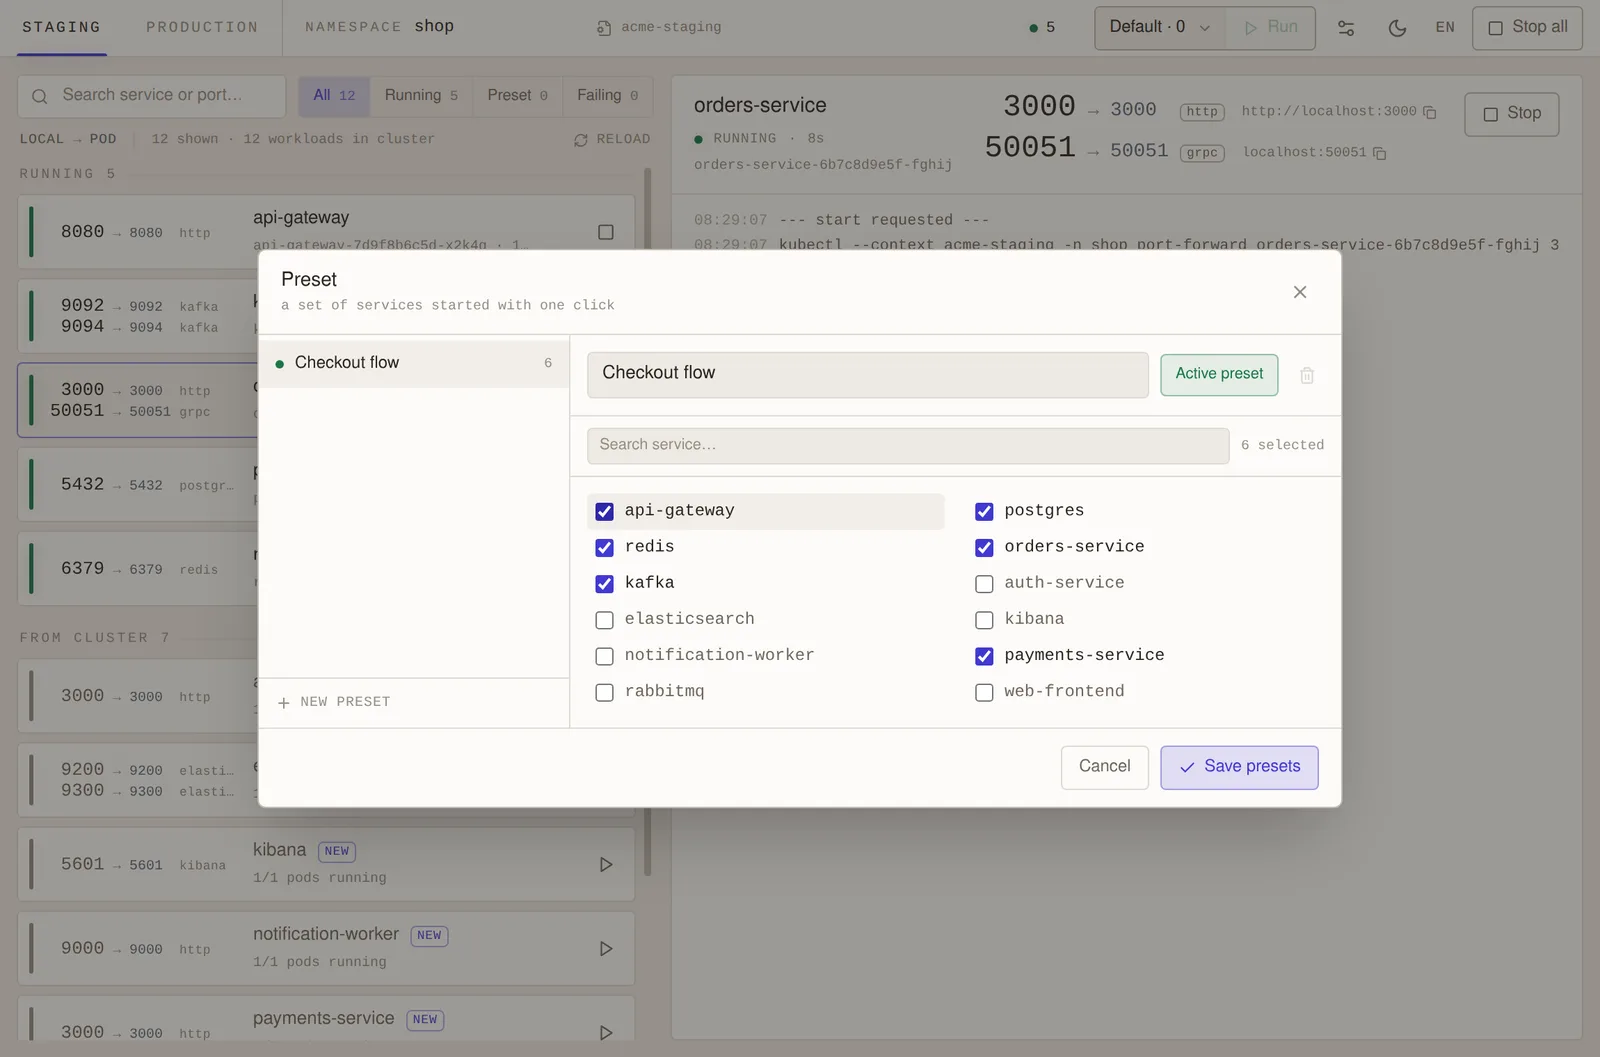
Presets: a named set of services that starts with one click (light theme).
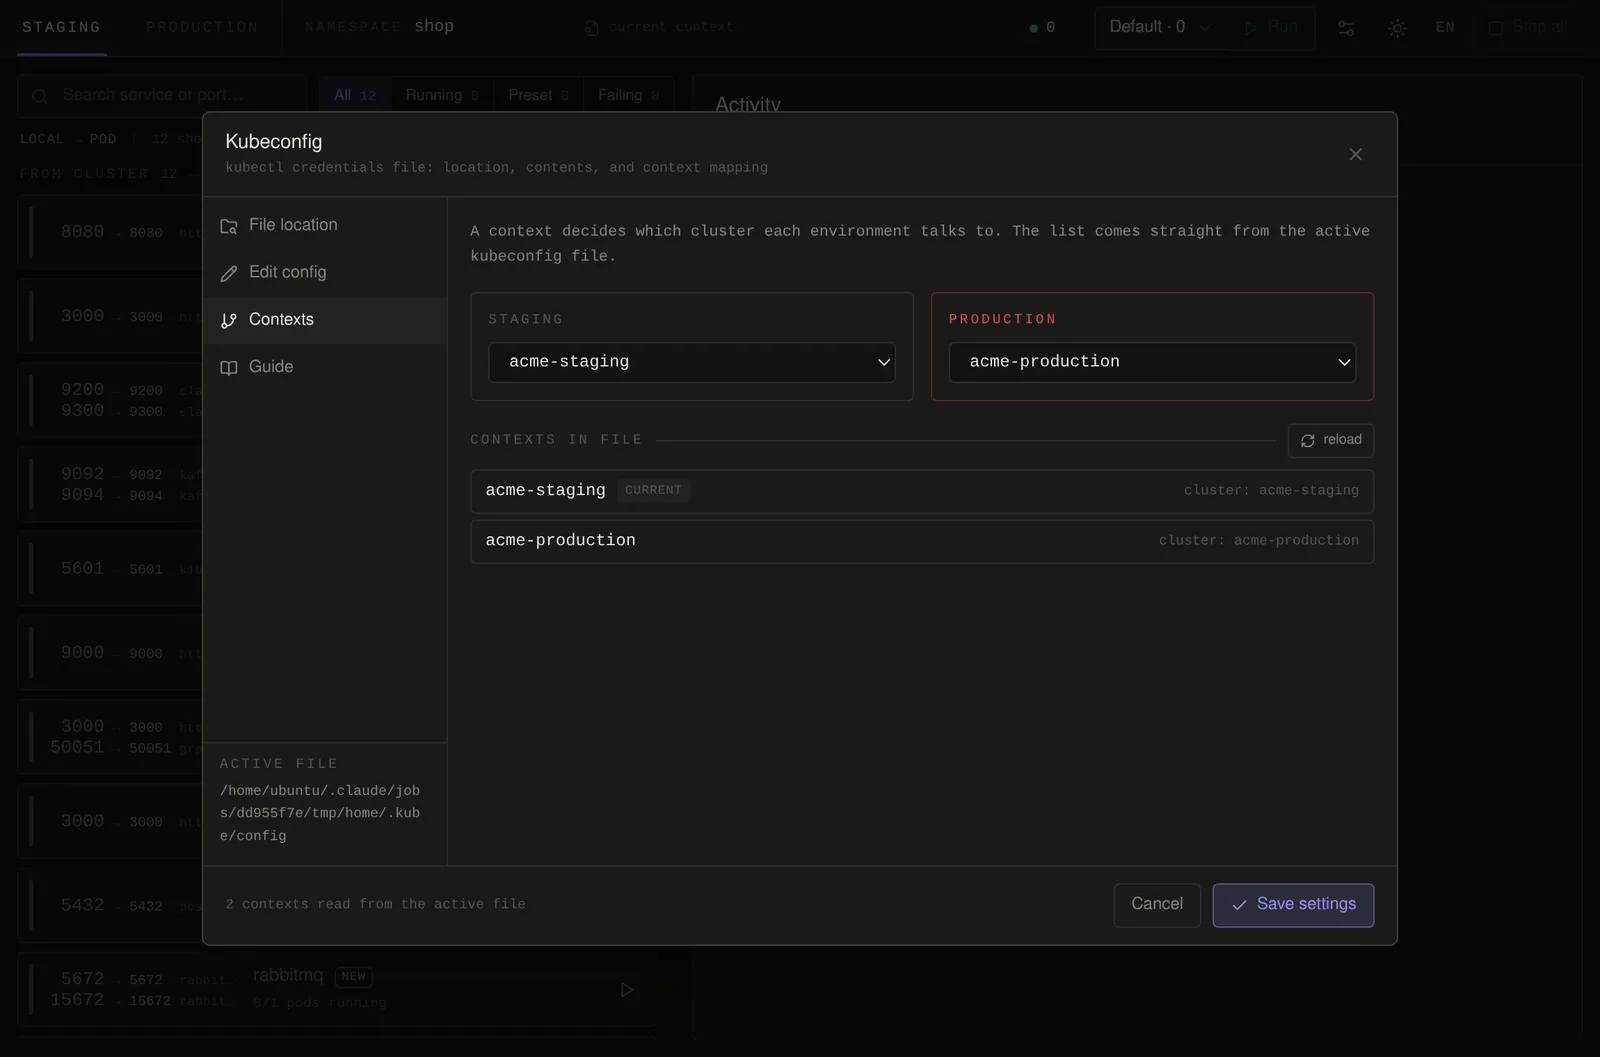
Kubeconfig manager: map a context to staging and to production.